
Every municipality with a standpipe or ground-level reservoir eventually faces the same conversation: the structure is ageing, the interior coating is failing, and doing nothing isn’t really an option once water quality, structural integrity, or both start showing signs of trouble. Municipal water reservoir lining in Canada comes with a specific set of challenges that don’t apply the same way to a residential cistern or a small agricultural tank, scale, access, certification requirements, and a climate that narrows the workable application window more than most municipal staff initially expect.
This guide walks through what actually goes into lining a municipal reservoir or standpipe in Canada, from the structural differences between the two, to certification requirements, to the cold-climate scheduling realities that shape how these projects actually get done.
Reservoirs and Standpipes Aren’t the Same Project
It’s worth being specific about the distinction, since the two structure types present genuinely different lining challenges. Ground-level or below-grade distribution reservoirs are typically large-footprint, often concrete structures storing significant volume at relatively low elevation, with interior surfaces that, while large, are generally more straightforward to access once drained.
Standpipes and elevated water towers present a different problem entirely. Interior surfaces are still large, but access is constrained by the structure’s height and shape, often a narrower cylindrical or bowl-shaped interior that makes staging, equipment access, and application logistics considerably more complex than a ground-level tank. The bowl section of an elevated standpipe, where the tank widens above the support column, adds another layer of access complexity that a straightforward rectangular ground reservoir simply doesn’t have.
Both structure types eventually need relining as original coatings age, crack, or fail to meet current water quality expectations, but planning a project without accounting for which type you’re actually dealing with tends to produce inaccurate cost and timeline estimates early in the process.
Why Canadian Municipalities Are Increasingly Facing This Decision
A lot of municipal water infrastructure across the country was built or last relined decades ago, and that aging inventory is now reaching a point where deferred maintenance isn’t really deferrable anymore. Concrete reservoirs develop cracking from decades of thermal cycling and structural settling. Steel standpipes see coating failure and corrosion once the original protective system finally wears through, sometimes well past when it should have been addressed.
This pattern connects to a broader trend affecting Canadian infrastructure generally, where ageing systems are meeting increasingly demanding conditions with less margin for delay than they used to have. Our piece on the growing pressure climate events are putting on Canadian infrastructure covers this wider context, and municipal water storage is really just one specific, high-stakes example of that broader pattern playing out.
What Municipal Water Reservoir Lining in Canada Actually Involves
For either structure type, a proper municipal reservoir or standpipe lining project follows a similar sequence, even though the specific access and logistics differ significantly between the two.
The reservoir gets drained and thoroughly inspected, mapping cracks, corrosion, or areas of coating failure rather than relying on a quick visual pass. Structural repairs, addressing cracks in concrete or corrosion damage in steel, happen before any new lining goes on, since coating over an unrepaired structural issue just delays the same problem rather than solving it. Surface preparation follows, profiling and cleaning appropriate to the substrate, concrete or steel, to give the new lining system a proper bond. The lining itself is applied at a specified thickness, often requiring multiple passes for full, even coverage across a very large surface area. Detail work at penetrations, access hatches, and structural transitions gets particular attention, since these points are disproportionately where failures start. Finally, the lining needs to fully cure according to the manufacturer’s specified timeline before the reservoir is refilled and returned to service.
Certification: What Actually Applies for Potable Water
This is where municipal reservoir lining carries a responsibility that a lot of smaller water storage projects don’t face in the same way. Any lining product being considered for a potable water reservoir needs a verified NSF/ANSI 61 certification under its exact product name, confirmed in writing directly from the manufacturer, not assumed from general marketing language describing a product as safe or food-grade. This verification needs to happen before a product is selected for the project, since discovering a certification gap after installation means redoing the work.
It’s worth noting this certification applies to the specific product tested, not to an entire category of coating chemistry, so a municipality can’t assume that because one polyurea or polyurethane product is certified, every similar product on the market carries the same status. Getting documentation for the exact product under consideration remains the only reliable verification method.
Cold Climate Scheduling: The Constraint That Actually Drives Project Timing
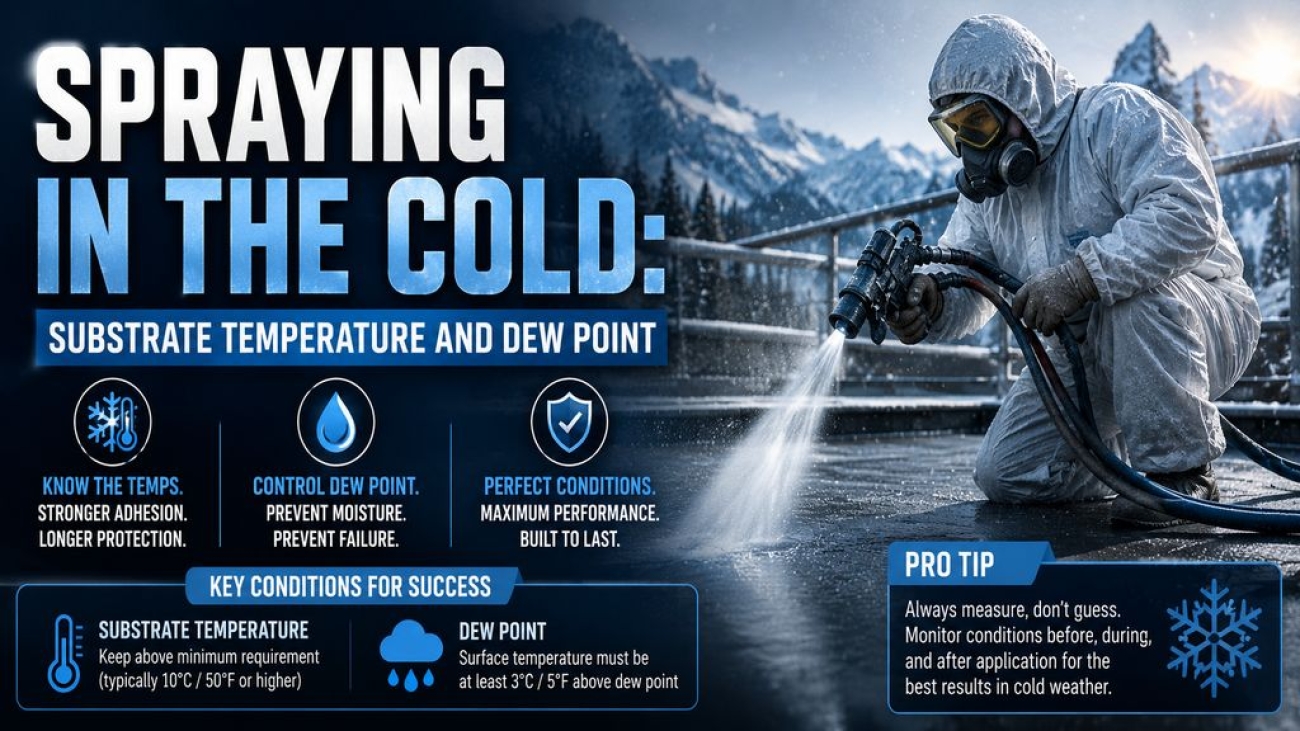
Canadian municipal reservoir lining projects have a narrower practical application window than similar work in warmer climates, and this affects project planning more than most municipal budgets account for upfront. Application requires the substrate to be within a workable temperature and moisture range, and getting that wrong doesn’t just risk a cosmetic problem, it risks adhesion failure that shows up as a much bigger issue well after the reservoir has been refilled and put back into service.
Our guide on substrate temperature and dew point for cold-weather application covers exactly why this matters and what a proper cold-weather application actually requires, and it applies directly to municipal reservoir projects that often get scheduled around a facility’s operational needs rather than around ideal application conditions. Coordinating a lining project’s timing with both the municipality’s water supply planning and a realistic application weather window, rather than treating them as separate scheduling problems, tends to produce a better outcome than either factor being treated as the sole constraint.
Reservoir vs. Standpipe Project Comparison
| Factor | Ground-Level Reservoir | Standpipe/Elevated Tower |
|---|---|---|
| Access | Generally more straightforward once drained | Constrained by height, bowl geometry |
| Typical substrate | Concrete common | Steel common |
| Staging complexity | Lower | Higher, requires elevated work planning |
| Structural repair focus | Crack repair | Corrosion removal and repair |
| Certification requirement (potable use) | Verified NSF/ANSI 61 for exact product | Verified NSF/ANSI 61 for exact product |
Things to Consider Before Planning a Municipal Reservoir Lining Project
- Has a thorough structural assessment actually been completed, mapping specific problem areas rather than relying on a general visual inspection?
- Is the project timeline realistic given Canada’s narrower cold-weather application window, or is it being scheduled purely around operational convenience?
- Has NSF/ANSI 61 certification been verified in writing for the exact product under consideration, before that product is selected?
- For standpipes specifically, has the contractor’s experience with elevated structure access and staging been confirmed, since this differs meaningfully from ground-level reservoir work?
- Is there a plan for water quality testing after refilling, before the reservoir returns to full operational service?
Our overview of polyurea coatings in Canada covers the broader regulatory and supply landscape that municipal reservoir projects operate within, useful context before getting into a specific project’s procurement process.
Maintenance After a Reservoir or Standpipe Relining
A properly relined structure still benefits from a periodic inspection routine rather than being treated as maintenance-free for decades. Checking for early signs of coating wear at access points and structural transitions, monitoring water quality at reasonable intervals, and keeping documentation of the original certification and application details on file all help a municipality manage the asset proactively rather than reactively. Our piece on why polyurea coatings are becoming a go-to solution for water storage covers some of the durability characteristics relevant to why this kind of lining, done properly, tends to reduce the frequency of major maintenance interventions over a structure’s service life.
Budgeting for a Municipal Reservoir Lining Project
Cost estimation for municipal water reservoir lining in Canada needs to account for more than just material and labour for the lining itself. Structural repair scope, which often isn’t fully known until the reservoir is drained and properly inspected, can meaningfully shift a project’s final cost compared to an initial estimate based on limited pre-drainage information. Staging and access costs for standpipes in particular tend to be underestimated in early budgeting, since the equipment and safety planning required for elevated interior work adds real cost beyond what a ground-level reservoir project would require for comparable square footage.
Building a reasonable contingency into the budget, rather than assuming the initial scope will hold exactly as estimated, reflects the reality that a lot of the true condition only becomes clear once the structure is actually drained and accessible for close inspection.
Frequently Asked Questions
How is standpipe lining different from lining a ground-level reservoir?
Standpipes present significantly more complex access challenges due to their height and often bowl-shaped upper section, requiring different staging and application logistics than a more straightforward ground-level structure, even though the underlying lining process follows similar steps.
Does municipal reservoir lining in Canada require special certification?
For potable water use, yes. The specific lining product needs a verified NSF/ANSI 61 certification under its exact product name, confirmed in writing before the product is selected for the project.
Can reservoir lining projects happen year-round in Canada?
Not practically for most regions. Application requires specific substrate temperature and moisture conditions, which narrows the realistic project window compared to warmer climates, making scheduling a genuine planning consideration rather than an afterthought.
How long does a municipal reservoir or standpipe relining project typically take?
It varies significantly based on structure size, extent of structural repair needed, and the specific lining system’s cure requirements, so a project-specific timeline is more useful than assuming a fixed duration.
What’s the biggest risk in a municipal reservoir lining project?
Underestimating either the structural assessment or the cold-climate application scheduling, both of which can lead to a lining that fails prematurely or a project that gets rushed into an unsuitable weather window to meet an unrealistic deadline.
Conclusion
Municipal water reservoir lining in Canada isn’t a simple coating decision, it’s a project shaped by structure type, certification requirements, and a climate that genuinely narrows the practical application window compared to most other markets. Getting the assessment, certification verification, and scheduling right upfront is what separates a relining project that delivers decades of reliable service from one that needs revisiting sooner than the municipality’s budget or its residents’ patience can comfortably absorb.